Friday, February 28, 2014
Hedy's "Under the Sea" Bag
I wish I could take credit for designing this gorgeous bag but I did not make it. It was made by my incredibly talented BFF, Hedy. Hedy does not have a computer so I am entering it on her behalf to the eclectic Paperie "Do Something with a Bag" Challenge.
Hedy's bag started out as a piece of canvas drapery fabric with aqua, mauve and tan colors that evoke a seascape. She used rubberstamps of seaweeds to create the background. Next she used silk ribbons, embroidery thread and various fibers and incorporated beads and seashells from re-purposed jewelry along with a variety of embroidery stitches and techniques to create her undersea world. Metal charms of sand dollars, fish and sea shells were added as embellishments. There is also some whisps of fine netting n the design. The sentiment was stamped on a separate piece of fabric with black Stazon ink and attached with an embroidery stitch around the edge.
Thanks for stopping by...hope you leave a comment and I will pass them on to Hedy. Paulette
Tuesday, February 25, 2014
Harbingers of Spring
As my month as Guest Design Team Member for eclectic Paperie comes to an end, it's time to post my last project. I was inspired by this beautiful Graphic 45 paper. After this bitterly cold Winter, I wanted to say good-bye to the month with a promise of Spring.
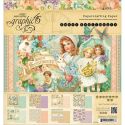
The Sweet Sentiments Paper Pad by Graphic 45 has some great Valentine and Easter/Spring designs. As soon as I saw it, I just knew I had the perfect use for the images in the pad. I had this pair of crib shoes that I picked up several years ago at a thrift store.
I photographed the unaltered shoe on pieces of the beautiful G45 paper pad to show you my inspiration for my colors and embellishments. To add weight to the slippers, I placed several large flat glass marbles inside each shoe. I also added flat bottom pearls to the straps to resemble buttons.
Above is a close-up of embellishments I added to images from the paper pad. The 2-ply butterflies were cut with a die from the set of Spellbinders Circle Butterflies. The tiny purple flowers were cut from vellum with a Punch Bunch flower punch. To add dimension I cupped the flowers by using an embossing stylus and a mousepad. I added centers to the flowers with a metallic gold gel pen. The large pink flower was punched and formed in the same way. A bit of rose colored organza ribbon was also added to her hat. These G45 elements were all fussy cut with my go-to favorite Cutter Bee Scissors. All the edges of these pieces were distressed with an Inkssentials Blending Foam Replacement Pad and Tim Holtz Distress Ink---Old Paper. The 3 images on the slipper on the right were matted on coral paper to tie in with the color of the girl's dress in the slipper on the left and also with the large paper butterflies.
The ivory colored flower sprigs that form the background and acts as anchors for the G45 elements are from the Botanica Collection by Petaloo. I attached the G45 elements to the sprigs with Mini-Glue Dots. The paper butterflies are from the Petaloo Printed Darjeeling series in a color called "paprika." They were also attached with the Glue Dots. The flowers nestled inside the slippers are a mixture of floral bridal embellishments and paper roses from my stash.
It has been fun being guest eP designer for the month of February. As the month of February ends, I hope that just like the robin, my project this week is a Harbinger of Spring!
Thanks for stopping by, Paulette Akagi
Ladies in Blue
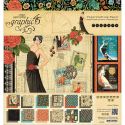
There's a color challenge on Splitcoaststampers today to use the a combination of midnight blue, an aqua and a pale blue-green. I chose these papers from the Graphic 45 Couture paper pad as the basis for my designs. The top card features tiny microbeads as a headpiece and a rhinestone flourish. The second card has gold filigree stickers as corner embellishments.
Have a great day!.........................Paulette
Monday, February 24, 2014
Asian Serendipity
The Try a New Technique Challenge on Splitcoaststampers today is called Serendipity. I used it to create the paper I used to punch out the flowers on my two cards. This technique is a great way to use up those scraps you just can't bear to throw out. The technique involves tearing up the scraps into small pieces and gluing them to a piece of paper to create a "new" paper. You can read more about the technique HERE.
The geisha on the left is an Art Accents stamp and the one on the right is a stamp by A Stamp in the Hand. I used my serendipity technique created paper to punch out the flowers with an SU Blossom punch. I edged the borders of the flowers with a gold leaf Krylon pen. The flower on the left has a gem center and the one on the right has a flower brad center. I used glittered chipboard flourishes, red elvet ribbon and a Starform gold sticker with red glitter as hair adornments.
Happy Monday.........................Paulette
Saturday, February 22, 2014
Worry Dolls
| My inspiration from the Wee Folk Studio is here: http://weefolk.files.wordpress.com/2...rtraitetsy.jpg and I used the Splitcoaststamper's sketch challenge for this week to construct my card. These tiny "Worry Dolls" were purchased while in Belize. According to the Mayan legend, when worrying keeps a person awake, he or she tells a worry to as many dolls as necessary. Then the worrier places the dolls under his or her pillow. The dolls take over the worrying for the person who then sleeps peacefully through the night. When morning breaks, the person awakens without the worries that the dolls took away during the night. I thought this would be a perfect card to send to a friend who is having troubles. Here's hoping your week is worry-free.........Paulette |
Thursday, February 20, 2014
Granny Panties
One of my swapmates chose "Grandma's Knickers" as her theme in our Pick a Theme swap. I found this handsome feller on the internet. The waves are a piece of scrapbook border. His panties are trimmed with some tiny lacy stickers from the dollar store that are designed for use as nail art.
Hope you enjoyed my humor........................................Paulette
Madame Butterfly
Meet Madame Butterfly. She was designed as a Tent Topper card (tutorial HERE) and to fit this week's sketch challenge on Splitcoaststampers. There is a new Butterfly Challenge Blog and the first challenge is to design something with flowers and butterflies.
I used this floral paper from Graphic 45's Bird Song pad as my color palette inspiration. Another floral element is the red flower gem hair ornament. For the butterflies, I used a Spellbinders Butterfly Circle die. The stamp is from Art Accents.
Thanks for stopping by...........................................Paulette
Wednesday, February 19, 2014
The Story of Millie and Molly's Trip to Paris
It's Paulette here today with my creations for Week Three as Guest Designer for eclectic Paperie. I've written a short scenario to accompany my projects.
The story begins in 1922 when our two fashionistas, Molly and Millie, see this poster in their local hat shop.
The story begins in 1922 when our two fashionistas, Molly and Millie, see this poster in their local hat shop.
The ladies are always fashion trendsetters and decide to attend the Spring Millinery Show in Paris on February 15, 1923. They buy two tickets for the fashion show. For all the shopping they intend to do, the ladies are taking a BIG purse full of money. This little altered purse I created memorializes their epic shopping adventure.
And now to explain my creative process: The project was inspired by a Graphic 45 8x8 paper pad called "Couture" and by this mini purse I picked up for $1 at a local thrift store.
I fussy cut all the ladies, the tickets and sentiments from the G45 paper with my Cutter Bee scissors and darkened the edges with a black Pitt pen. The two fans were cut from the G45 paper with a Die-namics rosette die. Behind the three ladies on the right is a blue scalloped oval cut from the G45 paper pack with a Spellbinders die. Before the paper was released from the die, I darkened the edges on the inner rim of the die with Tim Holtz Peacock Feathers Distress Ink using an Inkssentials Foam Replacement Pad. The black satin bow with rhinestone button is a repurposed shoe bow. The Eiffel Tower is a repurposed earring. Molly, fashionista on the left, is wearing gold rhinestone earrings. The other three embellishments are by Recollections.
The poster I created is actually an ATC for a Pick-a-Theme Swap over on Splitcoaststampers. My swapmate requested Vintage Hats as her theme. This ATC also uses papers from the beautiful "Couture" paper pad. Background paper is a red dotted swiss by Bazill. The ticket was fussy cut and its edges were darkened with a black Pitt pen. I fashioned the flower on the hat with a Punch Bunch hydrangea flower punch. I added dimension using a mousepad and an embossing stylus. The center is a gold rhinestone star. Red rhinestones were added to the hat, dress and used as earrings. Tiny gold corner stickers and a strip if red metal trim resembling the metal fabric mesh used in Whiting and Davis purses complete the design.
Thanks for stopping by...Paulette
Tuesday, February 18, 2014
Spring Chicks
This Graphic 45 image from their Sweet Sentiments paper pad had the perfect colors for today's color challenge on Splitcoaststampers. The challenge was to use straberry pink, green and yellow color combination and as a bonus include some flowers.
Wishing for an early Spring.............................................Paulette
Monday, February 17, 2014
Doodle-Dee-Doo!
There's a Technique Challenge on Splitcoaststampers today called "Doodling Made Easy." It is soooo easy. Here's what you do: after you cut a shape with a die, leave the die in place, trace the outer edge of the die with a white gel pen and then place a piece of pattern paper behind your cut outs.
My design uses Marianne Creatables dies and papers by DCWV and K & Co.
This is a fun and easy technique. Hope you will try it.
Happy Monday.............................................................Paulette
Thursday, February 13, 2014
Happy Valentines Day!
My intention to send all my peeps Valentines this year did not materialize. I did manage to design two cards...if you are reading my blog post today, consider these your cyber-Valentines.
The first card: I used a pre-embossed DCWV card as a base and G45 Sweet Sentiments for the image. The tiny pink flowers were punched with a Punch Bunch hydrangea punch and sculpted with a stylus on a mousepad. I added dark pink liquid pearls to the centers. Some gold filigree corner stickers and satin heart ribbon complete the design. The pink scalloped border was die cut with a Nellie Snellen die. The die is square but I made a rectangle by cobbling two squares together.
The second card: I used a pre-embossed DCWV card as a base and G45 Sweet Sentiments for the image. The tiny pink flowers were punched with a Punch Bunch corner punch and sculpted with a stylus on a mousepad. I added dark pink liquid pearls to the centers. Some gold filigree corner stickers and satin heart ribbon complete the design.
Have a Lovely Valentine's Day...........Paulette
Tuesday, February 11, 2014
Valentine Memory Box---Smitten
As eclectic Paperie's guest design team member for February, I'm back with another project. This week I chose to embellish a memory box. I am a Valentine fanatic and decided to decorate a box to store all my treasured Valentines.
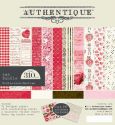
I found this box on sale at Michaels for $1.66. The box has a white cover and is printed with pink doilies and the hanging red foil hearts motif. The sides are covered in a red paper and continue the hanging hearts motif. To complement this pre-printed design I chose a 6x6" paper pad by Authentique called "Smitten." I used this pad for the doll's dress, the Valentine themed playing cards and the pink rose sticker.
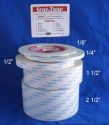
I chose a red lace trim and white ribbon with red hearts as a strip across the bottom to anchor my design. I used one of Julie Nutting's doll stamps by Prima. Some of the dolls have girl's names, this one is just called the Peasant Doll. Since she's my Valentine doll, I'm going to name her Philomena---meaning "powerful love." Her dress and headband were paper-pieced with a paper from the "Smitten" paper pack. I used some narrow Scor-Tape to add some lace trim to the neckline, sleeves and hem of the dress. The double-stick tape makes gathering the lace and attaching it to the paper dress a cinch. In her video Julie suggests always distressing the edges of the doll with ink. I used an Inkssentials Foam Replacement pad and Old Paper TH Distress Ink on the edges. I also used a black Pitt pen to outline the cut edges of the doll and dress. I cut some tiny white silk flowers off the edges of some ribbon to adorn Philomena's hair and dress. A red metallic gel pen was used to color the tiny flower centers.
Two metallic paper doilies---one red, one silver---form the base of the collage on the right side of the box cover. I cut five tiny Valentine themed playing cards cut from the "Smitten" paper and arranged them on top of the doilies. Paper flowers with pearl or red rhinestone centers were used in the collage. The "Smitten" pack also contains an assortment of stickers. I used the pink rose scalloped sticker after first distressing the edges with TH Barn Door Red Distress Ink.
Here's a side view of my memory box:
Thanks for checking out my blog post. Hope your mailbox will be filled with some lovely cards on Valentine's Day.................................................Paulette
Here are the links to the eP store for some of the products used above:
Saturday, February 8, 2014
Meet Millie and Molly
Let me introduce Millie and Mollie, two fashionistas, who are going to be featured in an altered art project I'll be posting February 19th as Guest Designer for eclectic Paperie. These ladies liked to party and were always on the leading edge of the latest fashion trends.
There's an Altered Playing Card Challenge going on over on the eclectic Paperie blog. I altered these playing cards by first adding some torn scraps of DCWV patterned paper to the cards. I distressed the torn edges of the background paper with a Victorian Velvet Tim Holtz Distress Ink pad. Once I pasted the background pieces to the card, I distressed the edges of the card and then inked them and the exposed area of the cards with the Victorian Velvet ink. The background paper on the left card already had a fine, sugary clear glitter and the paper on the right-hand card was already embellished with clear rhinestones. The label on the left card came from the same DCWV designer paper and the two labels on the right card were from scraps left over from some Graphic 45 Couture paper.
My party girls, Millie and Mollie, were fussy cut from some left over party invitations. I spent three days in the U. K. several years ago and needed to spend the rest of my British Pounds before I left the country. I happened on a sale in a stationery store and saw these pretty invitations with three fashionable ladies. Thought they would be great for use on altered art projects. The first of the three ladies had previously been used for a set of ATCs I made for a swap.
Hope you visit my blog again...on the 19th of February I will again be featuring Millie and Mollie as they travel to Paris for the Spring Millinery show.
Thanks for stopping by..................................Paulette
Tuesday, February 4, 2014
Valentine's Day Wall Decor
Welcome to my first post as February's Guest Design Team Member for eclectic Paperie. I'm so honored to be able to share my creations on the eclectic Paperie blog. Thank you Bonnie and Kim for providing me with this opportunity.
My project began with a metal heart that I purchased in a gift shop in Sheridan, Wyoming, many years ago. The heart already had somewhat of a distressed appearance---I loved the rusty old key hanging from the wire. The antique handkerchief came from my mom...she was a waitress and this was probably one of those decorative hankies that waitresses back in the 50's wore in their blouse pockets. The "LOVE" hanging from the key is a wooden laser cut icon from Prima. I painted it with a gold leaf Krylon pen and then distressed it with Brushed Corduroy TH Distress Ink. It hangs from a piece of gold cording.
Other items that you can find in the eclectic Paperie store that I used to create my project are my favorite scissors by Cutter Bee, Zip-Dry paper glue, Scotch Foam Mounting Tape (pops up and adds dimension to some of the paper images), Glue Dots Mini Clear to adhere the hankie and the large image to the metal heart. The Sakura Quikie Glue Pen is also great for teeny tiny flowers and the butterfly.
Thanks for stopping by and come back next week to see my next project for eclectic Paperie. Paulette
Subscribe to:
Posts (Atom)


